Properties of your print files
For a smooth processing of your print order, we ask for a technically correct printfile. This document ensures that all important aspects of the file are indicated and explained.
Follow these instructions for a more accurate final result. It is recommended to have your print-ready files developed by someone with initial experience in graphic techniques.
Software
Use software that allows you to manage the colour space and colour profile of your document. Our designers use Adobe
Photoshop and Adobe Illustrator for their versatility but any other software, which you are comfortable with and in which the features
described below can be applied, will suffice.
Use of colours
- Convert all files to Adobe RGB (1998). Why? Read it here.
- Pantone colours are not recognised by our printing software and can therefore only be printed with manual adjustment. Only orders placed through our sales department can be matched by our design department.
- To print deepest black use colour RGB (0,0,0).
- No white is printed, white is given the colour of the textile used (off-white).
- Save the .PDF file with the colour profile or output intention Adobe RGB (1998). Why? Read it here.
Resolution
- Create your .PDF file with a minimum resolution of 100 DPI and preferably use vectorised images. Why? Read it here.
- Make sure small points and fine lines are larger than 3 mm. Why? Read it here.
- Flatten transparent objects or effects. What is flattening? Read it here.
Extra
- Our software does not take into account invisible layers and/or (cut) marks; so to avoid problems, all elements that should not
be printed should be removed. - To avoid any mistakes with typography in the design, it is best to convert all text to outlines. Why? Read it here.
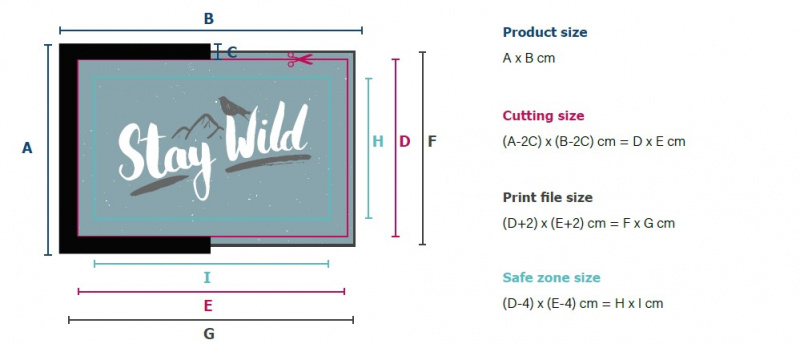
Dimensions
- To determine the size of the print file, do the following:
Substract the dimensions of the mat with the dimensions of any border. (If there is no border, you do not need to do this.)
This is the cut size. Why? Read it here.
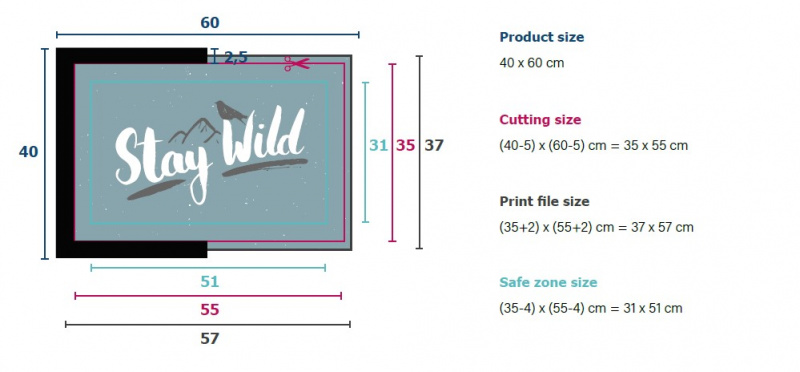
For the Patio quality, use a border size of 2,5 cm.
For Globossoft quality, use a border size of 1,5cm. - Now add 1 cm bleed, this will ensure that your design fits nicely to the edge of the finished mat. Why? Read it here.
- Stay 2 cm away from the edge with important elements. This will ensure that these elements will not be cut away. Why? Read it
here.
Below is an example of a Patio 40 x 60 cm with border.
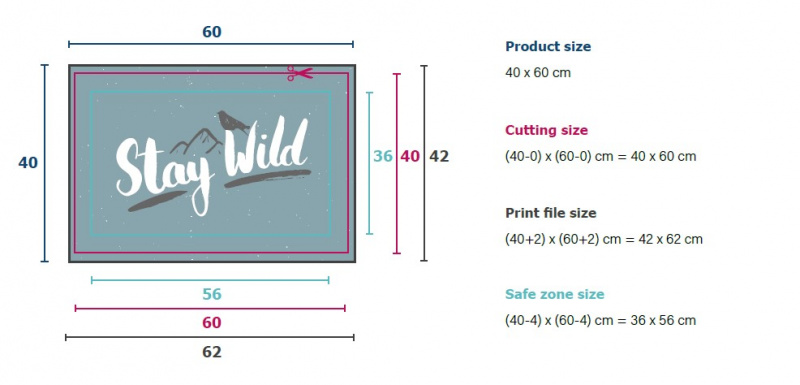
Below is an example of a Velvet 40 x 60 cm without border.
For your information!
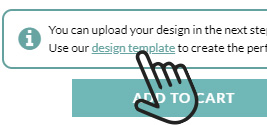
For all standard dimensions of all our products, you can get design blueprints that you can load into your design software.
Click on the design template link after configuring your product.